ZZZ Daze, Stun and Chain Attacks Explained
Learn how Daze creates a stun window in Zenless Zone Zero, when to use your support, and how to turn a Chain Attack into a clean damage rotation.
Original AI-assisted fan illustration for Zenless Hub. Artwork & editorial policy.
Daze is the route to a stun window; the damage you fit into that window is the payoff. For a conventional Stun–Support–Attack team, good timing matters as much as the equipment screen.
Daze and damage solve different problems
An enemy’s health tells you how far you are from defeating it. Its Daze gauge tracks progress toward Stun. A character who efficiently builds Daze can contribute heavily even if their personal damage looks modest.
Gamer Butler’s community core mechanics introduction presents the original Anby, Nicole and Billy trio as an example of building Stun, applying support and then attacking. This is a useful learning framework; it is not a rule that every modern team must use a dedicated stunner.
Give each part of the rotation a job
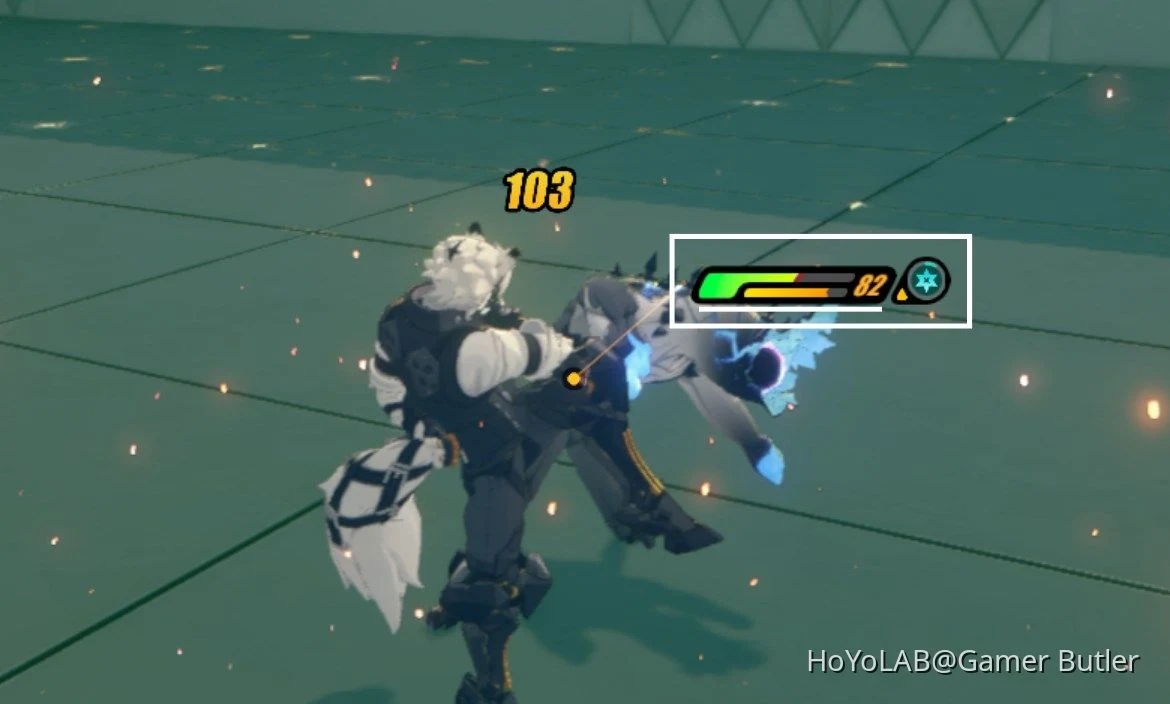
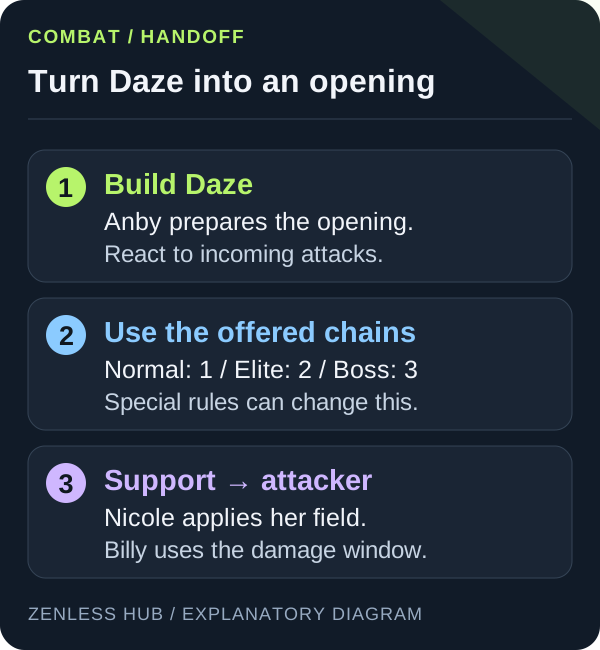
Start by using your stunner’s effective Daze tools while reacting to enemy attacks. Watch the gauge as it approaches full. When the enemy becomes stunned, use the appropriate heavy hit and Chain Attack opportunities offered by the encounter.
Bring in your support so its useful effect covers your attacker’s damage. Then spend the main damage window on your attacker. The exact order depends on skills and chain options, so pay attention to the active character at the end of the sequence.
Practice a short loop
- Enter training with Anby, Nicole and Billy.
- Build Daze while keeping the enemy in view.
- Use the offered chain sequence deliberately.
- Apply Nicole’s support and give Billy the resulting opening.
- Reset and compare whether your attacker arrived earlier or later.
The useful measurement is how much of the opening your damage dealer actually uses. A long animation sequence is not automatically an efficient sequence.
Common rotation mistakes
| What you see | What to do next |
|---|---|
| HP falls but Daze rises slowly | Inspect the Daze-producing attacks, not only ATK |
| The gauge fills and a chain prompt appears | Choose the next Agent deliberately |
| The chain finishes but Stun remains | Use the attacker’s remaining damage opening |
| The enemy resumes attacking | Return to setup and defensive awareness |
Chain length depends on the target
With a full squad, the normal framework is one Agent Chain Attack for a normal enemy, two for an elite, and three for a boss. A suitable heavy hit on a stunned target initiates the prompt. Encounter mechanics can alter the sequence; follow the actual choices shown. Combat guide and enemy-class examples.
| Target after Anby creates Stun | Learning example |
|---|---|
| Normal | Choose Nicole for the single chain, then take her Quick Assist into Billy |
| Elite | Use Billy’s Chain, then Nicole’s; hand back to Billy through Quick Assist |
| Boss | Expect a longer sequence; plan the final support application and attacker entry before accepting another animation |
The table is an input-planning example, not a fastest-clear claim. Available Bangboo prompts and special stage rules need to be handled separately. If the enemy is almost defeated, a longer animation sequence may offer no practical benefit.
Overstaying on the stunner: once its job is complete, unnecessary actions can consume the damage window. Supporting too early: a short effect may expire before your strongest attacks connect. Ignoring the next enemy move: surviving the setup is part of damage consistency.
If the opening takes too long to create, review Anby’s starter build and defensive timing. If the opening appears but damage stays low, check the attacker’s skills and equipment instead.
When this framework changes
Anomaly and other specialized teams can allocate field time differently. Begin with the Agent’s own skill descriptions and the encounter’s rules. Use this guide to understand a stun-focused team, then adjust the loop when a different character kit gives you a reason.
Published September 16, 2026 · Updated September 20, 2026 · See our editorial policy
Source-based editorial guidance. References and the scope of examples are identified in the article. How this content is reviewed.